
Today we’re going to see how you can create a Hotel Booking website. Let’s say you own a hotel, and you want to create a website for your hotel, So that anyone can book the rooms in your hotel, right from your website. You can do that by watching this video. So after watching this video, You’ll be able to create a hotel booking site like this, And if a visitor wants to book a room in your hotel, They can enter the check-in and check-out date, And the number of people, Now if they click book, They can see all the rooms available in your hotel.
Now the visitor can select any room they want. And here they can see the images of your room and all the facilities that you provide. Now if they want to book this room, They can click reservation, And select the number of rooms they want, Now here, they can fill in their details and then click place order to book the room, And they can pay you when they arrive at your hotel.
Now you can also let your visitors pay you on your site using this payment method, Okay. So once someone books a room on your site, You’ll receive a mail in your inbox like this, And here you can see the booking details of your customer. Okay! We will also see how you can provide extra facilities to your customers like this.
And then finally, we will see how you can customize your site to any style you want, Just by using drag and drop. So creating a hotel booking website can help you get more customers, And you can also make it quick and easy for your customers to book rooms in your hotel. Also, a hotel booking site will help you build & improve your brand image, so make sure you watch till the end to learn how to create one.
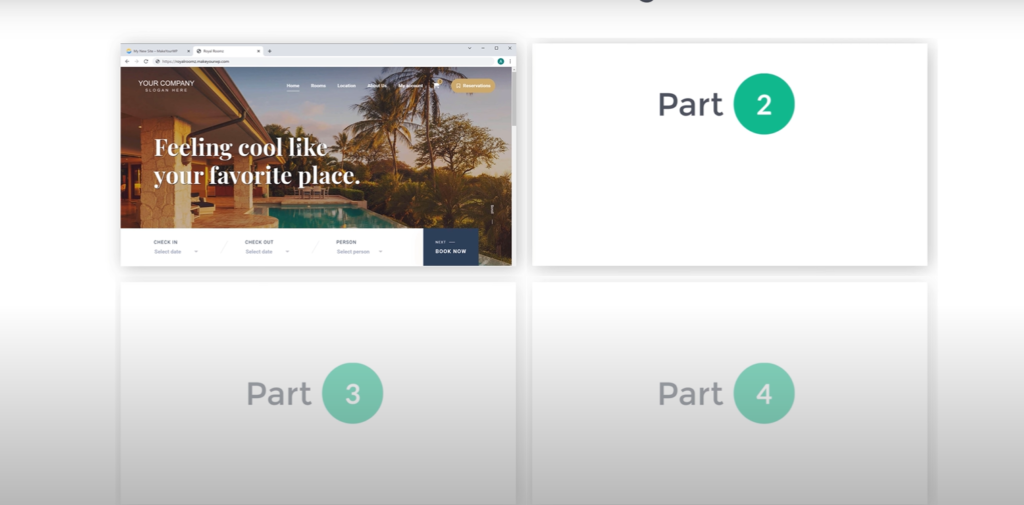
Okay! So, let’s get started, I am Bryan from Website Learners, And let’s create our hotel booking website. So to create a hotel booking website, We are going to do 4 parts, The first part is to ‘Launch your website’. Now, this is where we get a new website live on the internet. So to launch your website, Just click the link below this video, And it will take you to this website called “makeyourwp.com”.
This is the website which is going to help us launch our hotel booking website. Now to launch your website, Just scroll down, And here, you can find the hotel booking website. Now to see how this site looks, Just click ‘Demo’, And here you can see the complete hotel booking website that we’re going to launch.
Now if we go to rooms, We can see all the rooms that we have, Now if you click on this room, You can see all the details about the room. Okay! Now to get this hotel booking website, Just click ‘Launch site’ then enter your details, And click ‘Next’ Now enter your payment details, And click ‘signup now’ So now, we have successfully purchased the website.
Now to launch our site, Let’s click ‘launch new site’. And now it will take you to this page Now here, enter the website address that you want. I am going to enter ‘royalroomz_______’, Now your website’s address will be “‘royalroomz.makeyourwp.com” This is the address which people will visit to reach your site.
Now as you can see, our hotel booking website has already been selected. Now, once you have entered your URL, Let’s click ‘Launch new website’ And as you can see, our brand new website has been launched. So now if you click ‘Visit’ You can see that we have got the exact site that we saw, On the website name that we selected.
Okay! Now, this is just a temporary link to your site. You can easily change this to your own .com domain. We’ll see how you can do that later in this video. Okay! Once you have launched your site. Next, let’s go to part 2 of this tutorial, Where we see how you can setup your rooms. Once you set it up, You will be able to add your own rooms to your site, And your customers will be able to book their rooms.
So to setup your rooms, Let’s go to our site, And then go to rooms, Here you can see that we have these sample rooms. Now instead of these sample rooms, How do you add your own rooms here? So to add your own rooms, We are going to set up our rooms in just 3 steps, The First step is to login to your website. Once you login, you will be able to edit all the contents of your site.
So to login, All you have to do is, Just go to ‘makeyourwp’ And then click ‘admin’. And as you can see, we are now logged in to WordPress. And this is where you can control your site. Now, once you’ve logged in, We can now go to step 2, which is to delete these sample rooms. So to delete them, Let’s click ‘rooms’ And here you can see the sample rooms which we have on our site, Now to delete them, Just click here, To select all the rooms, And then click here, And select ‘Move to trash’ Now if we click ‘apply’ You can see that all the sample rooms have been deleted,
ALSO SEE HOW TO
- How To Create An Online Course, LMS, Educational Website with WordPress (2024)
- How ChatGPT Built My App in Minutes
- How to Create Entire Website with ChatGPT (No Coding)
So now if we go to our site, And click ‘Refresh’ You can see that we now have this blank page, Which means we can now add our rooms. Once you have deleted the sample rooms. Next, you can now go to step 3, which is to add your own room. So to add your own room, Just go back to your dashboard, And click ‘Add new room’ And now it will take you to this page, where you can add your own room.
Now to add your own room, All you have to do is, Enter your room name here, I am going to enter “Deluxe room” And then enter its description here, Once you are done, Scroll down and enter these details of your room, So let’s click here, And enter the number of deluxe rooms you have. I am going to enter 2. Then click here and select the number of adults you want to allow per room, I am going to select 2.
Once your done Now here, you can add the images of your room. So just click here, And drag the images from your computer and drop them here, As you can see, the images have been added. Once you have added the images. Now here, enter the price of your room. You can set the different prices for each day. So just click here, And then enter the price you want, I am going to enter price of my room.
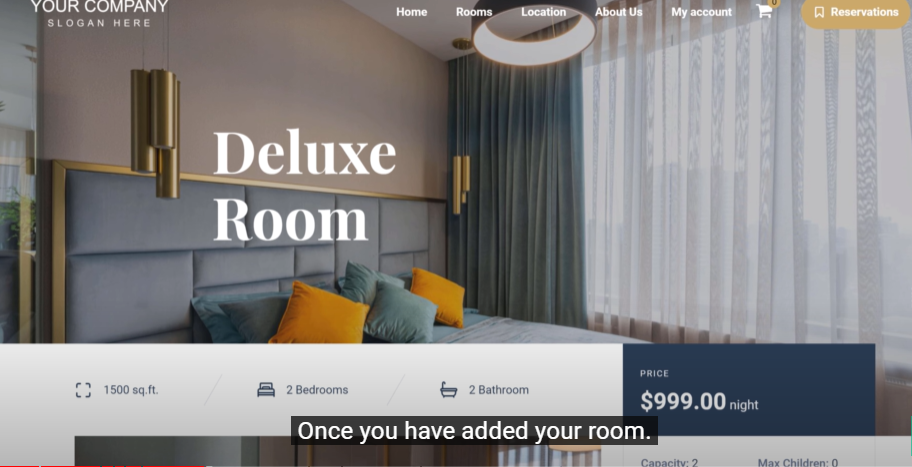
And also enter price of other days Once you have entered the prices, click here. And enter these details, Once you’re done. Scroll up, And add your featured image here, Now the image which you add here will appear on your site like this. So to add the image, Click ‘set featured image’, Now drag and drop the image from your computer.
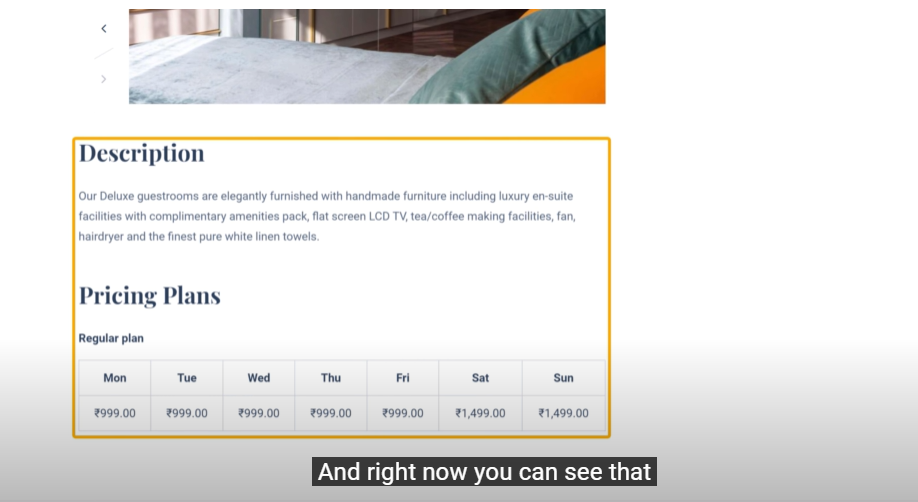
As you can see, the image has been added. Once you have entered all the details of your room. Click ‘publish’ Now if we go to our site, And click ‘refresh’ You can see that we have our room which we just added. So if we click on it, It will take us to this page. Here you can see that we have all the details of our room, which we added.
Okay! So this is how you can add your own room to your site. In the same way, you can add any rooms you want. Once you have added your room. Now here, you can see that we have the room price in US dollars. Now, instead of this currency. What if you want to have a different currency? So next, let’s see how you can change this currency.
To change the currency, Let’s go to our dashboard, And then go to ‘woocommerce’ And click ‘settings’’ Now scroll down, And here, you will find the currency option. Now, if you click here, you can see all the currencies that are available. So just select the currency you want. I am going to choose ‘Indian rupee’.
So once you have selected your currency. Click ‘save changes’. Now if we go back to our site, And click ‘refresh’ You can see that the currency has been changed. So this is how you can change the currency. Okay! Next, let’s see how a customer can book this room on your site. So to book this room, All they have to do is, just click on reservation.
And they will get this page. Now they can select their Check-in and Check-out date, And click “Check available” then they can just click here, And select the number of rooms they want, I am going to select 2. Then click ‘Add to cart’ And then click ‘proceed to check out’ Now here, the customer needs to enter these details.
And scroll down Here you can see that we have “pay on arrival”. Which means customers can make their payment when they arrive at the hotel. Once they have entered the details. They can click ‘place order’ And as you can see, the booking is confirmed. Okay! So this is how your customer can book a room from your site.
Now, what happens when someone books your room? How do you know that you have received an booking? Now, as soon as someone books a room from your site. If you go to your inbox. Here you can see that we have received an email. So if we open it, You see the details of the booking Okay! This is how you can know when someone books a room from your site.
Now, what about your customer? How do they view their order? So next, let’s see how your customer can view their order after booking their room. Once the customer has booked the room from your site, If they go to their inbox. You can see that they have received an email. Now if they open it, They can see the details of their order.
This is how your customer can view their order after they have booked their room. Once the customer books their room. Now, what happens when another customer books a room on the same date? So next, let’s try to book a room on the same date. Let’s go to our site, Now go to rooms, And then click on this room, Then click ‘reservation’ Now select the same Check-in and Check-out date.
And click ‘check available’ You can see that it says the room is not available. Now to book the room, You can select the other dates you want. So let’s try to book the room on the other dates. So just click ‘ok’. And select the other Check-in and check-out date you want, Then click ‘check available’ As you can see, it takes us to this page, This means the room is available on the date we selected.
So just click here, And select the number of rooms you want. I am going to select 1. And click ‘add to cart’ Then click ‘proceed to checkout’ And then you can fill up these details. Okay! Now if you scroll down, Here you can see that we have a ‘pay on arrival’ option. Now Instead of letting them pay at the hotel, What if you want your customers to make their payments on your site? Now In order to allow them to pay on your site, You need to set up your payment method.
So next, let’s see how you can set up your payment method. So to set it up, We are going to do 3 steps. The first step is to create an account in “Razorpay” So to create an account, Just go to the video you are watching right now, And then click this link, And it will take you to this site. Now here click ‘signup’, And here you need to enter your email address to create your account.
Or you can also use your google account to create an account in Razorpay, I am going to use my google account, So let’s click here, Now select your account, Now, here you need to select whether your business is registered or not. So if your business is registered, you can select the type from here, But if you haven’t registered your business, You can select this, I’m going to select this.
Once you’ve selected your business type. Enter your name and contact number here, Then click ‘Next’. And it will take you to your Razorpay dashboard, So now we have successfully created an account in razorpay. Once you’ve created your account. We can now go to step 2, which is to activate your account. Now in order to accept payments from your customers, First, you need to activate your razorpay account, So to activate the account, Just click ‘Activate’, And you will get this KYC Form.
Now to complete activating your account, You need to fill up these details and submit this form. So let’s fill up these details, Now as you can see, we have already selected our business type. Now click here and select your business category, I’m going to select my category. And then here, you need to enter a description of your business.
Once you have done that. Click here and select your average order value. I am going to select my order value. Now here, you need to select how you would like to accept payments from your customers. If you want to accept payments without your website, you can select this. Or if you want to accept payments on your website.
You can select this. I am going to keep this selected. And then here, you need to enter your website’s URL, So to get the URL, Let’s go to our website, Now copy this URL till here, Then go back, And paste it here, Once you have done that. Click ‘Save & Next’. Now here you need to enter your business details, Once you have filled all these details.
Click ‘Submit and verify’. And then you will get this box. Now in order to accept the payments from your customers. You need to complete this KYC Form. So to complete it, Let’s click ‘Complete KYC’ Now, here you need to enter your bank details, where you want to receive your payments. So let’s enter our details here, Now, when a customer makes a payment on your site, you will receive that payment to this bank account.
Once you’ve entered the details, Just click ‘Save & Next’. And finally, here you need to upload your aadhar documents for the address proof. Now to upload your document, Just drag and drop your file here As you can see, the file has been uploaded. Now, in the same way, you can upload the other document. Once you have done that.
Now to submit the form, Just click ‘Submit Form’. Now here, click on the checkbox. And again, click ‘Submit Form’. So now, we have successfully submitted the KYC form. Once you have submitted the Form. It will be verified within 3 to 4 working days. So after four days, if we go back to our account, Here, you can see that our Razorpay account has been activated.
So now you will be able to accept payments from your customers, And the amount will be transferred to your bank account directly. Okay! Once you’ve activated your account. We can now go to the final step, which is to connect this account with your website. Now to let your customers make a payment on your site, You need to connect your Razorpay account with your website, So to connect ‘Razorpay account’, Let’s go to our wordpress dashboard, And go to ‘Woocommerce’ And click ‘settings’ And then click ‘payments’
Then disable this ‘cash on delivery’ option. And then click on the razorpay, And it will take you to this page. Now to connect the Razorpay account with your website, Enable this option, And then you need to enter these details, So to get these details, Let’s go to our Razorpay account, click ‘settings’ Then click ‘API keys’ And click ‘Generate live key’ As you can see, we have got the details which we want.
Now you need to copy these details and paste them on your site. Once you’ve entered these details, Just scroll down, And click ‘save changes’. Now as soon as you click ‘save changes’, Your razorpay account will be connected with your website, So now your customers will be able to make payments on your site using razorpay.
So to check how it works, Let’s go to our checkout page, Now if we click ‘refresh’ You can see that the razorpay payment method has been added. Now your customers can make their payments on your site. So if we click ‘place order’ You can see that we have got different options to make our payment. So let’s say you want to make the payment with a card, Just click on it, And enter your card details here, And then click ‘pay’ So, now the payment has been made successfully, And as you can see, the order has been placed.
Okay! Now, Once the order has been placed, How do you know that you have received that payment? So to check it, Let’s go to our inbox, And as you can see, we have received two emails, The first email is from WordPress, And the second one is from Razorpay, So if we open the first email from WordPress, You can see all the details about the order.
Now, if we go back And open the second email, You can see that we have the details of the payment. Now just click here, And it will take you to the Razorpay account. And here you can see your customer details, And then within four days, this amount will be transferred to your bank account. Okay! Now after 3 days, if we open our inbox, You can see that we have got an email from Razorpay, So if we open the email, As you can see, the payment has been transferred to our bank account.
So, this is how you can know that you have received the payment. Now you know how your customer can pay you online and book the room. Okay! Now Instead of getting the full payment online, What if you want to get some money in advance and get the balance payment when the customers arrive at the hotel, It’s very simple.
? So next, let’s see how you can get the payment in advance. Now to get the payment in advance, Let’s go to our dashboard, Then go to woo commerce And click ‘coupons’, Then click ‘add coupon’ And you will get this page, Here enter any name you want. I am going to enter ‘payment in advance’ Once you have entered the name.
Click here, And select this/percentage discount, And then here, enter the percentage you want your customers to pay in advance. I am going to enter 50. So now when someone books the room, 50 percent of the amount can be paid on your site. And balance 50 percent of the amount they can pay during the check-in time.
Once you are done. Now to show this ‘Payment in advance’ option automatically when the customers book the room, you need to Click here, And click ok, And it will be applied automatically on all bookings. Now here enter any name you want, I am going to enter Note Okay! Once you are done. Click ‘publish’ Now the payment in advance option will be added to your site.
So if we go to our site, And click on this room, Then click ‘reservation’ Now select the “Check-in and Check-out date” then click ‘check available’ Now click here and select the number of rooms you want, I am going to select 1. Then click ‘add to cart’ And you can see that the payment in advance option has been added.
Now your customers can pay this amount for now, And then they can pay this balance 50 percent when they arrive at the hotel. So if we click ‘proceed to checkout’ Your payment in advance will be added to the checkout page. So this is how you can get the money in advance from your customers. Okay! So next, Let’s see how you can add the free facilities to your room like Tv, Gym, Wifi, etc.
So to add the facilities, Let’s go to our site, And click on this room, Now scroll down, And right now you can see that we don’t have any facilities. So to add that, Just click ‘edit room’ And it will take you to this page. Now scroll down, And in this “Room extra options”, Click ‘amenity’ Now click “Add row” And as you can see, the new row has been added.
Now to add the facilities, Here enter the name of your facility. I am going to enter TV. Now to add the image of your facility, Click ‘Add image’ And then choose the image you want, And click ‘select’ As you can see, the image has been added. Okay! So now we have added one facility. In the same way, you can add any facility you want.
Let’s add one more facility. Scroll up And click update Now the facility will be added to our room To check that, Let’s go to our site, And go to rooms, then click on this room, Now scroll down And you can see that the facilities have been added. And your customers don’t need to pay for any of these facilities.
Okay! This is how you can add free facilities to your room. Next, let’s see how you can add paid services extra options for your customers, like cab service, laundry service, etc., So to add the services, Let’s go to our dashboard, Now go to ‘bookings’, And click ‘extra options’ Then click ‘Add new’ And you will get this page, Now here, enter the name of the service which you want to add.
I am going to enter “Cab service” And here, enter the price of the service. I am going to enter my price, And then click here and select the type of service you want. Let’s say you’re providing a daily service, you can select ‘trip’ Or if you want your visitors to select the number of services they want, you can select ‘number’.
I am going to select ‘number’. Once you are done. Click ‘publish’ Okay! So now we have created one paid service. In the same way, you can create any service you want. Now let’s create one more service, So just click ‘add new’ Now like we did before, Here enter the name of the service you want I am going to enter ‘Laundry service’ And then enter its price.
Since we are creating a daily service, Just click here and select ‘trip’, Now if you want to make this service required. You can click here to include this for all bookings. Once you are done, Click ‘publish’ Okay! So now we have created the paid services. Now to make these services available to your customers, We need to add these services to our room.
So to do that, Just go to ‘rooms’ And then click edit here, Now scroll down, And here you can add the additional services, So just click here, and select the services which you have created. I am going to select my services. Once you have done that. click ‘update’ Now the services will be added in our room, To check that, Let’s try to book the room on our site.
So let’s go to our room, click refresh, and click ‘Reservation’, Now select the ‘Check-in and Check-out date, And then click ‘check available’ Now as you can see, we have got the paid services which we just added. Now to book the room, First let’s select the number of rooms, I am going to select 1. Now you can select the service you want.
So let’s select it. Now here, enter the number of cabs you want. I am going to enter 2. Once you select it, Click ‘add to cart’ You can see that the paid services have been added to our cart. And here you can see the total amount. This is how you can add paid services for your customers. Okay! So now we have successfully created a complete hotel booking website.
Now if we go to our website. Here you can see that, Our website address ends with makeyourwp.com Now instead of this, what if you want your website to have a simple address like “royalroomz.com” which looks more professional. You can do that by getting your own domain name for your site. So next, let’s go to part 3 of this tutorial, where we see how you can get your own domain name for your hotel booking website.
To get your domain name, Just go to the video which you are watching right now. And then click the link in the description, And this will take you to Webspacekit.com, where you can buy your domain name. Now here, enter any name that you want for your website. I’m going to enter royalroomz.com Now if you click ‘search’.
You can see that this domain name is available. So once you find a name which is available. To get this name for your website, Just click ‘Add to cart’ And then click ‘continue’ And now it will ask you to select a hosting plan. As we already have hosting for our site on MakeYourWp, Let’s click ‘skip’. And now it will take you to this cart page, Now here you can see that we are getting our domain for 1 year.
And after 1 year, you need to renew your domain, to keep using it. So to get this domain, Let’s fill up these details. And then enter your payment details. Now if we click ‘Order now’ You can see that we have successfully made our payment. Now if we click here, You can see that we have got our domain. Okay! So once you’ve got your domain.
Now how do you connect this domain with your website? So next, let’s see how you can connect this domain to our hotel booking website, which we just built. So to connect this domain, we’re going to do 2 steps, The first step is to add a domain to your website. So to add the domain, Let’s go to makeyourwp.
com, And then go to domains, And here, you need to enter the domain name which you purchased. So I’m going to enter royalroomz.com, Once you’ve entered your domain, Let’s go to the final step, which is to add this IP address to your domain. So to add it, Let’s go to this tab, And then click on domains, Now select the domain, which you purchased, And then click ‘Manage DNS’.
Now next to the ‘A’ record, Here we need to add our IP address which is shown here. So let’s go back to this page, and then copy this IP Address, Then come back to our domain, And paste the IP address here, And we’re done! So let’s click ‘save changes’, Now let’s go back to ‘Makeyourwp’ And click connect domain.
And now we’ve successfully connected our new domain name to our website! So let’s check it, Now if we open a new tab, and type our new domain name which is royalroomz.com And press enter, You can see that we’ve got our hotel booking website which we just created. Now if we click rooms, you can see the room which we have created.
So now, your visitors & customers can just go to your domain name to access your site and your rooms. So this is how you can get your own domain name for your website. Okay! Now we have a complete hotel booking website. Now in future, let’s say you have got an update to your theme. And you want to update your theme, So to do that, All you have to do is, Let’s go to our wordpress dashboard Now go to appearance And click ‘themes’ Here you can see that, new version of your theme is available In the updated version,
we will be getting new features on our theme If you want to get the new version Just click here and a new tab will be open Now if we go to this tab Here you can purchase the new version of your theme to get the latest updates Now if you don’t want to update your theme, you can be in the current version Your website will remain the same and all your content will be safe.
Okay! Once you have got the domain for your site. Next, let’s go to the final part of the video, where we see how you can edit the content of your website. Let’s say you want to edit this text. How will you do that? So to edit any content on your site, Just go to that page, And click ‘edit with elementor’ And it will take you to this editing section.
Now, let’s say you want to change this text, All you have to do is, Just select the text, And then enter your own text, I am going to enter “Luxurious stay at Affordable price” As you can see, the text has been changed. In the same way, you can edit any text you want on this page. Just select the text, And then start typing.
Okay! Now let’s say you want to change this background image. Just click here, And then drag and drop the image from your computer. As you can see, the background image has been changed. Now in the same way, you can change any image you want. Now let’s say you want to change this image, All you have to do is, Just click on it, then click images And click here, Now drag and drop the image from your computer.
As you can see, the image has been changed. Okay! Once you are done with all the changes, To save your changes, Just click ‘update’. And now if we go to our site, And click ‘refresh’ You can see that all the changes have been applied. Now in the same way, you can edit any page you want. Just go to that page, And click ‘edit with elementor’ And then you can start editing your content.
Okay! Next, let’s see how you can add your logo here, So to add your logo, Just go to your dashboard, And click ‘theme options’. And you will get this page, Now go to header, To add your logo. First, let’s remove the default logo from here, So just click here, And the logo will be removed. Now click ‘Add image’ And then drag and drop the logo from your computer.
And the logo will be added. Now to save your changes, Click ‘update’ And then go back to your site, And click ‘refresh’ You can see that the logo has been added. So this is how you can edit the content of your website. Okay! Let’s say you have two rooms, Now a customer has directly visited your hotel and booked a room.
Now if we go to our site, And click on this room, And click reservation Then select the check-in and check-out date, And click check available, And if we click here, You can see that we still have two rooms. Now how will you let others know that a room has been already booked? So to do that. We need to add that booking to our site.
So next, let’s see how you can add that booking to your site. To add that booking to your site, Just go to your dashboard, Then go to ‘ bookings’ And then click ‘bookings’ Now here you will find all the bookings you have received. Now to add the booking, which you have received at your hotel. Click ‘add new’ And you will get this page, Now click here, and select how your customer has made the payment.
And then click here, and select the booking status, If the booking is completed, Just select ‘completed’. then click here, And enter your customer details. Once you are done, Here you need to add the room which your customer has selected. So to add the room, Click ‘Add room item’ And you will get this box. Now click here, And type the room which they have selected, And then click on it, And it will be added.
Now select the Check-in and Check-out date, which they have selected. And click ‘check available’ Now you need to select the number of rooms they have chosen. So just click here and select 1. Once you have done that. Click ‘add’ As you can see, the room has been added. Once you have added the booking. Click ‘save book’ And the room will be booked for your customer.
Now, let’s try to book the same room on the same date from our site, So just go to your site, And click refresh, Then click reservation, Now select the same Check-in and Check-out date, And click check available, Then click here, Now as you can see, only one room is available. Which means the other room has been already booked.
And this is how you can add the booking to your site, which you have received at the hotel. Okay! So that’s it, guys, This is how you can create a hotel booking website. Now if you’re ready to make your hotel booking website, you can click the link below this video. It will take you to Makeyourwp page, where you can launch your website and start building your hotel booking website.